Sunday, February 2, 2014

Our World: Africa

Africa is such a vast continent, this was a hard one to teach in just a short amount of time. I guess I could have made it a longer lesson, but at this age, there really isn't a point to do so. So, like I've suggested before, teach your children about things they are interested in and things that you think they will like to learn about. The other thing I like to do at this age, is open up discussion. Instead of having them sit and do work books, or run through flash cards, I've noticed that my kids learn better by being active, by seeing something, and through discourse. In just about everything we do, we talk. From family meal times to playing pretend, to bath time, we are talking non stop about everything that pops into their heads.

GAMES:

For this lesson plan, I made sure that Henrik and I got a few hours alone so we could play Mancala. This is a game I highly recommend getting for children who are starting to comprehend numbers and can follow simple directions. I don't have any pictures of us playing this game, but you can see the game here. I can't believe how well he did at this game. To be honest, we don't really play board games with our boys yet, mostly their attention span isn't long enough. But, this was a great starter game. In fact, a few days after we played together, Henrik ran into our bedroom early in the morning, "Momma!? Is Theo old enough to play now? He's almost two, is that old enough? I want to teach him." Sure enough, when I woke up enough I walked into the play room as I heard the beads hitting something, and there they were, both boys, playing nicely, and Henrik was teaching Theodor Mancala!

While Henrik and I played, we discussed a lot about Africa. I showed him pictures of people in various parts of the continent, and showed him pictures of their houses, kids playing, people working, and families being together. I also took the opportunity to talk to him about Nelson Mandela. This lesson co-in sided with his death, so I figured, the best way to honor someone is by teaching my son about them.

While I half expected Henrik to ask questions about skin color, he didn't. Instead, he asked questions about the differences in clothing, the differences in houses and why so many people didn't have shoes. Those were sometimes harder questions to answer, but I made it work. I also showed him that the children didn't have cars to play with, instead they had hand made toys and used nature in every way. He thought it was a cool idea and then made the connection himself to the beads, the wooden board and the game Mancala.

MASK ART:

When I looked at the continent of Africa, I realized that there was SO much I wanted to teach my boys, but I started with African art. As a history major, I vividly remember my Art History classes where we studied African masks and sculptures in depth. I thought that making masks would be a great project to introduce African Art to my boys.


All I did here was cut up a single paper bag to make the shapes of the masks. I cut out holes for eyes, and used left over side from the bag to make noses that we could tape on to add depth. 


The boys had a great time making these and thought they were fun to use as they chased each other around the house. And honestly, I think they turned out great! I love having them on my wall! 

BEAD ART:
When we were talking about the masks and different tribes in Africa, we started to talk about how people in Africa dress and how they decorate their clothing. I decided that doing some bead art would be a great way to get the boys some fine motor skills and teach them about the art of beading. 

We did two different beading projects, one where Henrik had to make a bracelet with beads that had letters on them...

 And a bracelet that was made from twine and wooden beads.


READING:
My boys love to read, so in order to follow suit with our African theme, I wanted to read them stories that I had grown up with: Anansi The Spider, Why Mosquitoes Buzz In People's Ears and First 100 Animals. However, even though we read stories and looked at pictures, I explained to the boys that most of the stories, and the stories that we were reading, were traditionally told orally. So in order to get that point across, I did my best theatrical reading, using multiple voices and getting them involved in the story. I also tried to explain that these stories were stories that explained a moral lesson or taught people how the earth was created. They didn't really understand that mindset, but some day they will. 


SENSORY BINS:
Another project we did was to create our own African Safari. We used kinetic sand, and WOW, I LOVE IT. So did the boys, it's really the coolest thing out there. Anyway, I put animals from Africa in the sand and created a sensory bin for them to play in. They probably played here for an hour as the created things with the sand and marched their animals around the "safari". Yes, I know there are no Tigers in Africa, however, it was near impossible to tell my boys that. They insisted that the tigers join the other fierce animals. 


After we were done with a cultural lesson of Africa, I decided to  include the study of Ancient Egypt. This year my boys became familiar with a "mummy" thanks to Halloween, so I thought I'd take the opportunity to teach them about real mummies and Egypt too.

LEGO PLAY:

I find that Legos are the perfect toy. You can use them to create just about anything, and they come in handy for kids who like to be hands on. For this lesson, we used Legos (and team work) to build a pyramid. I built the base, the boys added in a mummy, some gold doubloons and some gems, then they closed it all in. They were pretty happy with the way it turned out. 


After our pyramid lesson, we looked at pictures of the different types of pyramids and ziggurats around the world. I asked them questions like, how they thought they were built and how old they were. Then Henrik wanted to see the Sphinx. He learned about the Sphinx from an Little Einsteins episode so we googled some images and talked about why the Sphinx was created, what kind of creature it was and how it was built. 

PLAY DOH MUMMY:

My boys always like to use play doh, and it seems we go in cycles, but since we hadn't gotten it out of the closet for a while, I decided to let them play with it and create their own mummies. This time around, Henrik was more excited about playing and building his own creations, and that's totally fine with me. Theo on the other hand, was very into creating "not a scary mummy". This lesson was a little hard because the mummification process can be a bit scary, or... detailed. But I just explained that in Egypt, when kings or other important people died, other people wrapped their bodies to preserve the dead. They were buried with their most favorite things so they could have them in the after life. The boys weren't grossed out by that. 


This was a simple and very inexpensive project for them to do. I asked them to pick out a person, someone who is important, and then asked them to "make a snake" out of the doh. I then showed them how to wrap the doh around the figurine they chose. Pretty easy, and Theo wanted to do this project over and over. He liked seeing if the Firefighter was still in there. Perfect for fine motor, perfect for pretend play, perfect for the lesson. 

MUMMY DOGS:

All of that play made us hungry so I decided that we could make something fun for lunch that day. I had seen some Halloween foods for parties on Pinterest and decided to make mummy dogs with my boys. I should have planned ahead better and purchased some Pillsbury crescent rolls or something like that, but since I didn't, but I wanted to continue our lesson on mummies, I decided to make pizza dough and wrap hot dogs in that. The boys thought that this was the best lunch ever and Henrik even ate a hot dog! 

To make it a little more fun, we added eyes (once they were cooked and cooled) and a cheese pyramid to our plates :) 

EGYPTIAN CATS:

In High School I did a speech on the mummification process. For a while, I was really obsessed with the Egyptian culture and King Tut and all of the history of this nation. I wanted to convey some of that to my boys, so I taught them about how cats were so important to the Egyptian people. They seemed to think it was cool! Especially since cats were the first pets and were able to catch mice and SNAKES! We don't have any symbolic figurines in our house, but a lot of people do so I used this lesson to teach the boys about different religious and symbolic figures. Cats, were the perfect project to help teach this lesson. 

Using toilet paper rolls, pine cones, pipe cleaners, foam and googly eyes, I was able to create these cat figurines with the boys. At the end of our project, I showed them pictures of these cat statues and even cat mummies, and asked the boys how our cat was different. The noticed immediately that the cats in the photos had earrings, necklaces and other decorations on them. So, we of course decorated ours! 

Tuesday, January 28, 2014

Our World: South America

Before the holiday season and before we took a break from our regular life to focus on family, crafts for you, and of course Christmas Vacation, the boys and I were learning about where we live.

Actually, since we started our lessons back up when we moved to Colorado, I've been building on my lesson plans. I started with all about me, moved into a lesson about our family, and where we live. Once the boys understood the concept of the United States and how they related to it, I wanted to build on that idea and teach them about the world. At this age, I decided to stick with the continents and focus on a few things that stick out in each place. You can find our North America plans here.

And now that we're back in the swing of normal life, I've got about a million lessons to share with you!

When we looked at South America, and when we look at any part of a lesson, I focus on three main things: 1. What I think my boys will relate to. 2. What they already know and how I can build on that concept. 3. Can I throw in an interesting fact that they will find cool?

Based on what they already know about South America, I decided first to have them learn about the Amazon.

When we learn about a new place, I always teach my sons about the animals that live there, so we decided to make a collage of the Amazon River. Using foam stickers we already had, we were able to create some pretty creative pictures (yes, I know clown fish don't live in the Amazon) of the animals that live there.


For one of Henrik's birthdays, he was given this Melissa and Doug Sticker set. It has different scenes, dessert, rain forest, ocean, farm, etc and you can put removable stickers on these play mats. Henrik loved playing with the rain forest set and we had a pretty good time learning about the different types of habitats that exist in South America. 


Because my boys were really into animals, more than any other thing during this lesson, I decided to teach them about llamas. They thought it was really cool that llamas could pull heavy loads up and down the mountains, I don't think they ever thought that a llama could be so strong!

So, we made some!


After we made llamas we looked at pictures of Machu Picchu,  and tried to figure out what we'd have our llama take to the top if we were going on that journey. They came up with some pretty funny things, but I especially liked how they thought to bring food for the llama. 

Thanks to the Internet and youtube, we also looked at the different types of architecture they have in this part of the world and compared their houses to our houses, their landscapes to ours and their clothing to our clothing. One thing that found fascinating was that even llamas wore "blankets" that were full of color. They were a little confused as to why our dog didn't wear clothes like some of the llamas we saw pictures of. 

Sunday, December 22, 2013

Day 22: Felt Tree Ornaments

We had some felt left over from our snowman project and our heart project so I decided to put it to good use! There's always an opportunity to reuse craft supplies! Right?

What You'll Need:
Felt
Hot glue
Pom poms
Bells
Other decorations like beads, etc.
Ribbon
Scissors

Step One:
Cut out triangles out of the felt.


Step Two:
Use a heavier felt as backing so that the triangle trees will be able to hold the accessories you put on them. Cut out the backing so you can glue on the felt triangle. Glue the tree to the backing. 


Step Three:
Let your child decorate the tree! Put the glue on where they tell you to, and let them create! 


Step Four:
Take the dried trees, and use your scissors to just cut a line in the felt so you can stick a ribbon through. 


Tie a knot in the ribbon. 

Step Five:
Hang them up! Or give them to a friend! 


Saturday, December 21, 2013

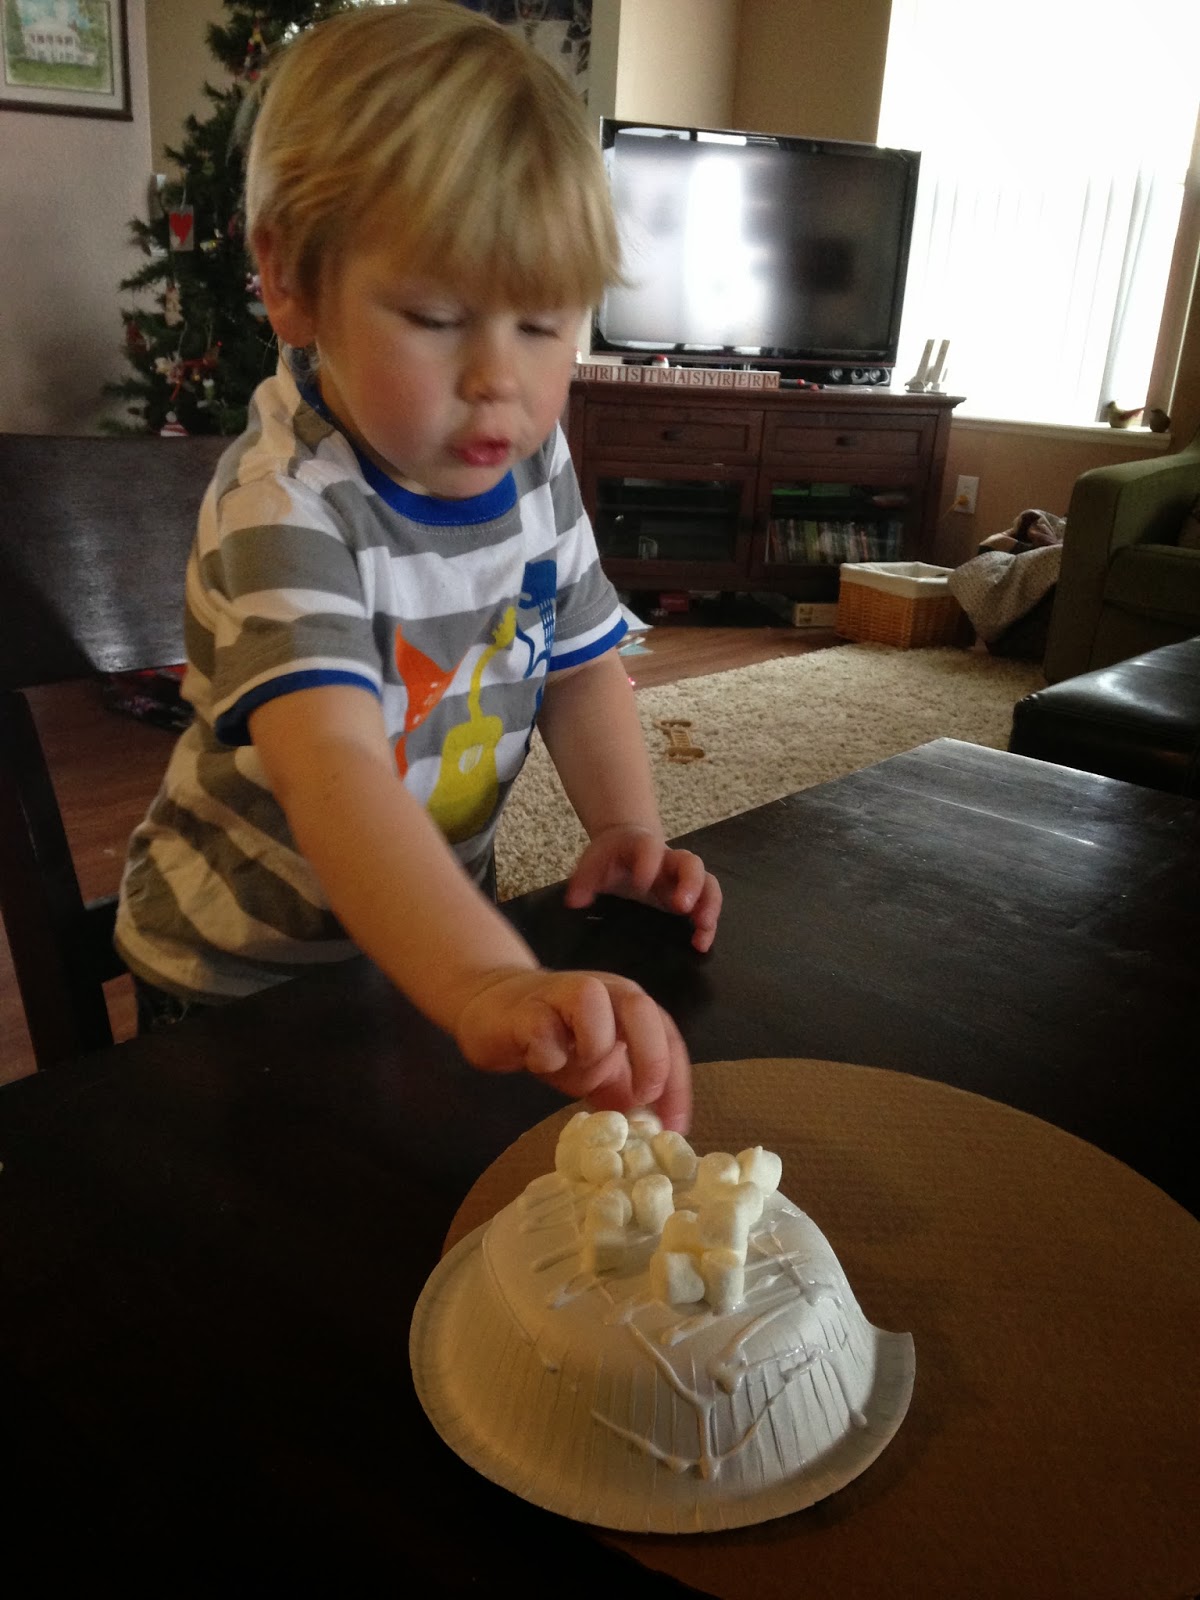
Day 23: Marshmallow Igloos!

This fun project can be edible if you want, sort of like an igloo version of the gingerbread house. Or, you can just use what you have from home or left over projects to make a beautiful winter scene.

What You'll Need:
Paper bowls
Scissors
Marshmallows or Cotton Balls
Frosting or Elmers glue
Hot Glue
Frosting or Spray Glue
Cardboard or Plate
Fake snow or Coconut shreds
Any other candy or decoration you like

Step One: 
Take your paper bowl, turn it upside down and cut an arch out of one of the sides.


Step Two:
Take your "igloo" and use the hot glue gun. Glue the bowl to the cardboard. If you've got left over boxes from packages, use the short sides of the box, or to get a circle, use the bottom of a frozen pizza! I'm telling ya, I save everything for projects! 


Step Three:
Put glue (or frosting) all over the igloo and let your kids decorate! Of course, they are going to want to eat some. 


We ran out of marshmallows so we used cotton balls to help cover up the igloo. 

Step Four:
I had left over animals form our Globe Ornaments and I had left over snow, so I used the spray glue and covered the cardboard really well with the glue. The fake snow covered it perfectly. If you are making the edible version, you'll put frosting down, and then cover the ground with other delicious goodies. 


I had a few fake diamonds we added to make ice or a lake, and a tree from the snow globe project so we added a few more accessories, and had the perfect winter scene. 


Well, that's it for your 23 days of Holiday Crafts. I do have a few more surprises for you over the holiday, but we are going to wait to do them with our family in Michigan! We get to celebrate our own little family Christmas tonight and then off we go! We wish you a wonderful Christmas and a Happy New Year!

Day 21: Sun Catchers

Here's a little craft that I found in the check out aisle at Michael's I am sure you can find these at any hobby store, craft store, or even Target. I'm sure the Dollar Store has them too. Either way, these were a great easy project for the boys to do on a snowy afternoon.

What You'll Need:
One Kit

Step One:
Lay out the different Sun catchers, let your kids choose which ones they will paint.


Let them paint the plastic sun catchers.

Step Two:
Once they are painted, let them dry.


Step Three:
Once dry, use the ribbon in the kit to make it hang on a tree or on a suction cup for the window. 


Step Four:
Hang! And enjoy! We've been waiting for a sunny day to put ours up! 


Friday, December 20, 2013

Day 20: Popscicle Snowflakes

Today was another messy glitter day in my house, and while I was smarter about protecting the table from spry glue and glitter, my hands are covered in glue and glitter. Oh well. I guess I'll get it right one of these days.

What You'll Need:
Popscicle sticks
Hot glue gun
Spray Glue
Glitter

Step One:
You can have your kids do this or you can prep it in advance. I chose to prep this for them. So, I glued sticks together so that they were in the shape of a snowflake: start with a cross, then add sticks on to fill the gaps, keep making crosses.


Step Two:
Once they are dry, give them to the kids! I used the Elmer's Spray Adhesive glue and covered the whole snowflake. (It dries quickly, so you may want to spray it again after a few minutes) Then, I gave the boys glitter and let them go! 


They were much better at using the glitter this time so it was way less messy. 

Step Three:
Once the snowflakes dry, shake them off and get the last little bit of glitter off. Once you have done that, you can turn them over and glue on a ribbon to make the snowflakes hang. To do this, you just take a ribbon and tie a knot. Then you use your hot glue gun and make a big glob of glue on a spot on the snowflake. Stick the ribbon onto the glue. Push it down, be careful, the glue is hot. Let it sit for a few minutes while it dries. 


Step Four:
Hang it on your tree! 

Thursday, December 19, 2013

Day 19: Heart Felt Ornaments

I love simple projects and simplicity in decorations. I love when ornaments mean something and when they tell a story. I think we all have a story about love, or about the simple icon of a heart. And now, you can give this cheap, easy and adorable ornament to someone who means something to you!

What You'll Need:
Felt
Glue gun
Ribbon
Scissors

Step One:
Take your felt and cut out heart shapes. Make as many as you want. Make them all different sizes.
Then, take a piece of felt, I found some "hard" felt that I decided to use as a backing for these ornaments, you don't need it, but I thought the gray looked nice and it was the only gray I could find. Once you decide which color will be your backing, cut different sized squares or rectangles.


Step Two:
Let your kids create! Lay out the different colors, and different sized hearts and let them build their ornament! Because felt sticks to one another, let them create their ornament...


 Once your child is done making the perfect Love Ornament, reinforce it with a hot glue gun. 


Step Three:
Take your scissors and cut a hole for the ribbon so these can stick on your tree. I just made a "cross" or an "X" in the felt and stuck the ribbon through. 


Step Four:
Once the ribbon is through, tie a knot and then you're done! The perfect, simple, easy ornament of the season.